Screenshots are a vital tool in digital communication, allowing users to capture what’s displayed on their screens for various purposes. Whether you want to share information, save a moment from a video, or troubleshoot an issue, knowing how to take a screenshot is essential. Windows provides several methods for capturing screenshots, each with its own set of features and functions. In this guide, we will explore these options in detail.
1. Understanding the Print Screen Key
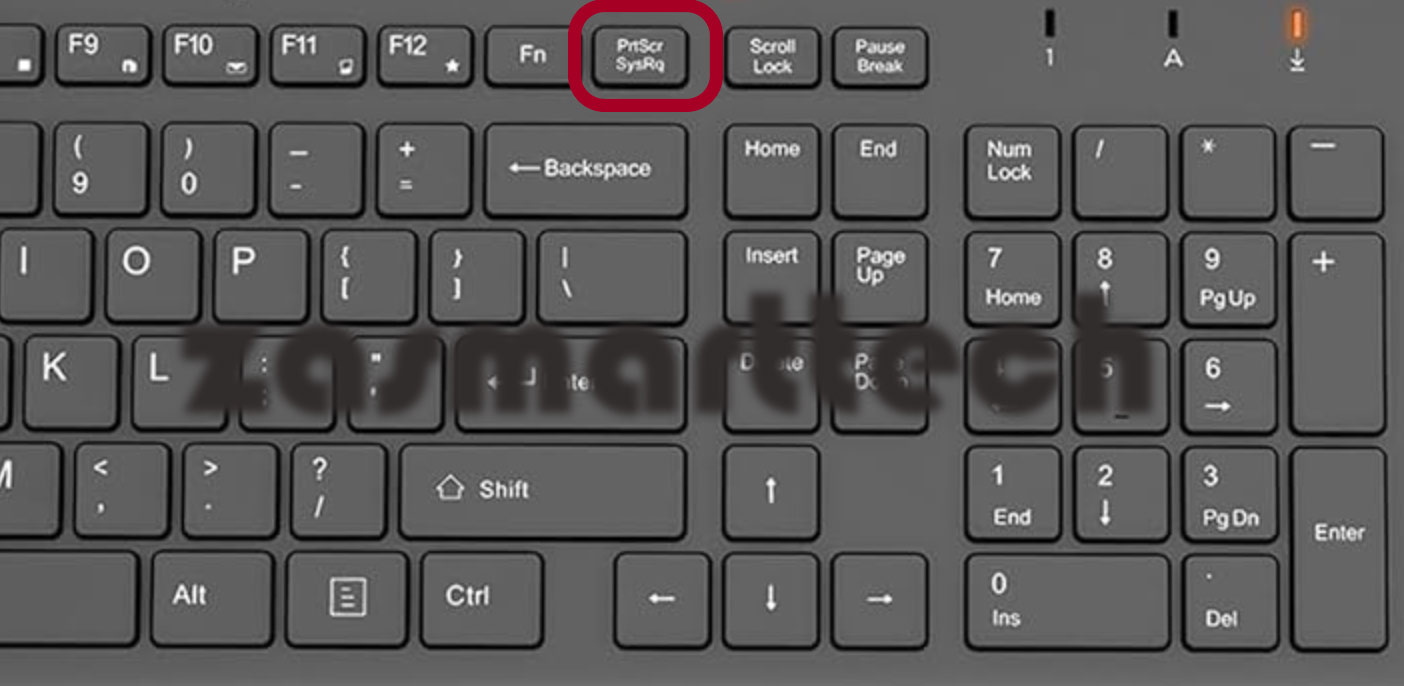
The Print Screen key (often labeled as PrtScn, Prnt Scrn, or similar) is your primary tool for taking screenshots on Windows. It’s a standard key on most keyboards, usually found in the top row, near the function keys.
A. Full-Screen Capture:
- How to Use:
- Simply press the PrtScn key.
- This action captures the entire screen and copies it to the clipboard.
- Open an image editing program such as Microsoft Paint, or any document editor like Microsoft Word.
- Paste the screenshot using Ctrl + V.
- Use Cases:
- Perfect for capturing full-screen applications or websites.
- Useful for creating presentations or sharing information quickly.
B. Active Window Capture:
- How to Use:
- Click on the window you want to capture to make it active.
- Press Alt + PrtScn.
- This captures only the currently active window and copies it to the clipboard.
- As before, paste it into an image editor or document.
- Use Cases:
- Ideal for capturing specific applications without the distractions of your desktop.
Great for creating focused screenshots for tutorials or guides.
C. Automatic File Saving:
- How to Use:
- Press Windows key + PrtScn.
- The screen will dim briefly, indicating that a screenshot has been taken.
- This screenshot is automatically saved to your “Screenshots” folder located in the “Pictures” library.
- Use Cases:
- Best for users who want a quick way to save screenshots without pasting them manually.
- Useful for creating a collection of screenshots for a project.
2. Utilizing Snipping Tool
The Snipping Tool is a built-in application in Windows that provides more control over how you capture your screen. It allows you to capture specific areas or types of screen content.
A. How to Access Snipping Tool:
- Search for “Snipping Tool” in the Start menu and open it.
- Once open, you’ll see options for taking different types of screenshots.
B. Types of Snips:
- Freeform Snip: Draw any shape around the area you want to capture.
- Rectangular Snip: Drag the cursor around an object to form a rectangle.
- Window Snip: Capture a specific window.
- Full-Screen Snip: Capture the entire screen.
C. Saving and Sharing:
- After taking a screenshot, you can annotate it using the provided tools.
- Save your screenshot in various formats (PNG, JPEG, etc.) or share it directly through email or other applications.
3. Using Snip & Sketch
Snip & Sketch is an upgraded version of the Snipping Tool, offering more modern features and a streamlined interface.
A. How to Access Snip & Sketch:
- Open Snip & Sketch from the Start menu or press Windows key + Shift + S.
- This opens a small toolbar at the top of the screen.
B. Taking Screenshots:
- Choose from the same snip types available in Snipping Tool.
- After capturing, a notification will appear, allowing you to click and edit your screenshot.
C. Features:
- You can annotate your screenshot using a variety of tools (pen, highlighter, etc.).
- Easily save, copy, or share your captured image.
4. Windows + Shift + S Shortcut
This keyboard shortcut is one of the quickest ways to take a screenshot without needing to open an application.
A. How to Use:
- Press Windows key + Shift + S.
- The screen will dim, and a toolbar will appear at the top.
- Select the type of snip you want and capture the area.
B. Use Cases:
- Quickly capturing portions of your screen without cluttering the clipboard.
Ideal for creating concise and focused screenshots
5. Advanced Screenshot Techniques
While the methods above cover the basics, there are advanced techniques and tools that can enhance your screenshot-taking experience.
A. Third-Party Screenshot Tools:
- Greenshot: A free tool that offers advanced editing features, including annotations and export options.
- Lightshot: Simple and efficient, allowing quick uploads to the web for easy sharing.
- Snagit: A premium tool that offers extensive features for capturing, editing, and organizing screenshots.
B. Tips for Effective Screenshots:
- Clean Your Screen: Close unnecessary windows and clear your desktop before taking a screenshot to avoid distractions.
- Use Annotations Wisely: If you’re creating tutorials, highlight important areas or add arrows to guide the viewer’s attention.
- File Management: Regularly organize your screenshots in folders to avoid clutter.
6. Troubleshooting Common Issues
Even with the many options available, you might encounter issues while taking screenshots on Windows.
A. Print Screen Key Not Working:
- Ensure that the PrtScn key isn’t disabled by checking your keyboard settings or using third-party software.
- Try using alternative methods like Snipping Tool or Snip & Sketch.
B. Screenshots Are Not Saving:
- If using the Windows key + PrtScn method, ensure that your screenshots folder hasn’t been moved or deleted.
- Check permissions on your “Pictures” library to ensure you have the right to save files.
C. Captured Images are Blank:
- Make sure the window you are trying to capture is not minimized or off-screen.
- Check if any screen recording software is interfering with the screenshot functionality.
Conclusion
Taking screenshots on Windows is a straightforward process, but understanding the various methods available can enhance your productivity and efficiency. Whether you prefer using the Print Screen key, the Snipping Tool, Snip & Sketch, or third-party applications, each method has its unique advantages. By mastering these tools, you can easily capture, edit, and share important information from your screen.

